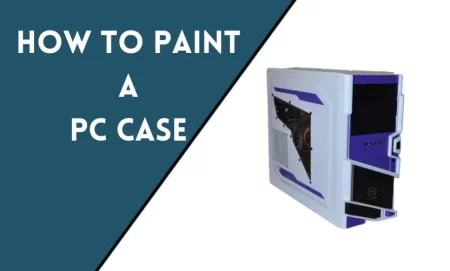
In this article, we will guide you through the process of painting your PC case to give it a personalized touch and enhance its aesthetic appeal. Whether you want a sleek and professional look or a vibrant and creative design, painting your PC case can be a fun and rewarding DIY project. Follow the steps below to achieve stunning results.
Introduction
Welcome to our guide on painting a PC case. Your computer case doesn’t have to be a dull and boring piece of hardware. By painting it, you can transform it into a unique masterpiece that reflects your personality and style. In this article, we will walk you through each step, from choosing the right case to showcasing your painted creation.
Choosing the Right PC Case
Before you start painting, it’s essential to choose the right PC case. Consider factors such as the case’s size, material, and design. Ensure it offers ample space for your components and has removable panels for easy painting. Select a gaming setup case that matches your style and preferences, as the paint job will enhance its overall appearance.
Preparing the Case for Painting
Proper preparation is essential to achieve a smooth painting process and a flawless finish. Begin by removing all components from the case and disassembling it into separate pieces. This will make it easier to paint each part and avoid unwanted paint on sensitive components.
Gathering the Necessary Tools and Materials
To paint your PC case effectively, gather the following tools and materials:
- Screwdriver set
- Sandpaper (various grits)
- Cleaning solution or rubbing alcohol
- Microfiber cloth
- Painter’s tape
- Plastic sheets or drop cloths
- Spray primer
- Spray paint in your chosen colors
- Clear coat for protection
Removing Components and Disassembling the Case
Carefully remove all components from your PC case, including the motherboard, graphics card, power supply, and storage drives. Take note of their connections and make sure to keep track of all screws and small parts for reassembly later. Disassemble the case into its individual panels and remove any removable parts, such as fan grills or front panels.
Cleaning and Sanding the Surface
Clean the case panels thoroughly using a cleaning solution or rubbing alcohol to remove any dust, grease, or fingerprints. Once dry, use sandpaper with a medium grit to sand the surface gently. This process helps the paint adhere better and creates a smooth finish. Finish with a fine-grit sandpaper to achieve an even smoother surface.
Applying Primer
Before painting, apply a spray primer specifically designed for the material of your PC case. Follow the manufacturer’s instructions and apply thin, even coats to all surfaces. Primer helps the paint bond effectively and improves the overall durability of the finish. Ensure that the primer is fully dry before proceeding to the next step.
Choosing the Paint and Painting Technique
Select high-quality spray paints suitable for your case material. Consider the color scheme and effects you want to achieve. Explore various painting techniques, such as using stencils, gradients, or color fading, to create unique designs. Remember to shake the spray paint cans thoroughly before applying them.
Applying the Base Coat
Start by applying the base coat, which serves as the primary color for your PC case. Hold the spray can at a distance and apply thin, even coats, allowing each coat to dry before adding the next. Building up the paint gradually prevents drips and uneven patches. Apply multiple coats until you achieve the desired color intensity.
Adding Designs or Patterns
Once the base coat is fully dry, you can add designs or patterns to your PC case. Use painter’s tape or stencils to create crisp lines or shapes. Experiment with different techniques to personalize your design further. Take your time and ensure the base coat is completely dry before applying tape or stencils to avoid any paint peeling off.
Applying Clear Coat for Protection
To protect your newly painted PC case and give it a glossy finish, apply a smooth and clear coat. Clear coats provide an extra layer of protection against scratches and fading. Apply thin, even coats, following the manufacturer’s instructions. Make sure to let each coat dry completely before applying additional layers.
Reassembling the Case
Once all the painted parts are completely dry, carefully reassemble your PC case. Refer to your notes or photographs taken during disassembly to reconnect all components correctly. Take your time to ensure everything fits securely and all connections are properly made.
Cleaning Up
After finishing the reassembly, clean up any paint residue or debris from your workspace. Dispose of used painter’s tape, empty spray cans, and any other materials appropriately. Keep your working area tidy and organized for future projects.
Showcasing Your Painted PC Case
Now that you’ve completed the painting process, it’s time to showcase your painted PC case. Set up your computer in a well-lit area and admire your creative work. Share pictures on social media or with friends and let them appreciate your unique design. Be proud of your accomplishment!
Conclusion
Painting a PC case allows you to unleash your creativity and personalize your computer setup. With the right tools, materials, and techniques, you can achieve stunning results. Remember to follow each step carefully, from preparation to reassembly. Enjoy the process and let your imagination guide you. Transform your PC case into a work of art that reflects your style and sets your computer apart.
Frequently Asked Questions
Can I paint a PC case without disassembling it?
It is highly recommended to disassemble the case before painting to achieve the best results. Painting a fully assembled case can result in overspray or paint reaching sensitive components.
How long does it take to paint a PC case?
The time required depends on various factors, such as the size of the case, the complexity of the design, and drying times between coats. Generally, it can take a few days to complete the painting process.
Can I paint a plastic PC case?
Yes, you can paint a plastic PC case. Ensure you use a spray paint specifically formulated for plastic surfaces and follow the same steps mentioned in this guide.
Do I need to remove the stickers or logos on the case before painting?
It is recommended to remove any stickers or logos from the case before painting. You can use a hairdryer or a heat gun to gently warm the stickers, making them easier to peel off.
How do I maintain the painted finish on my PC case?
To maintain the painted finish, avoid using abrasive cleaners or rough materials when cleaning your PC case. Use a soft cloth or microfiber cloth to gently wipe away dust or smudges.